Pad printing mugs, bottles and curved items
Curved drinkware asks more from a pad printer than a flat keyring or pen barrel. The shape, coating and print position all affect whether the image lands cleanly or stretches at the edges.
Curves change the way the image leaves the pad
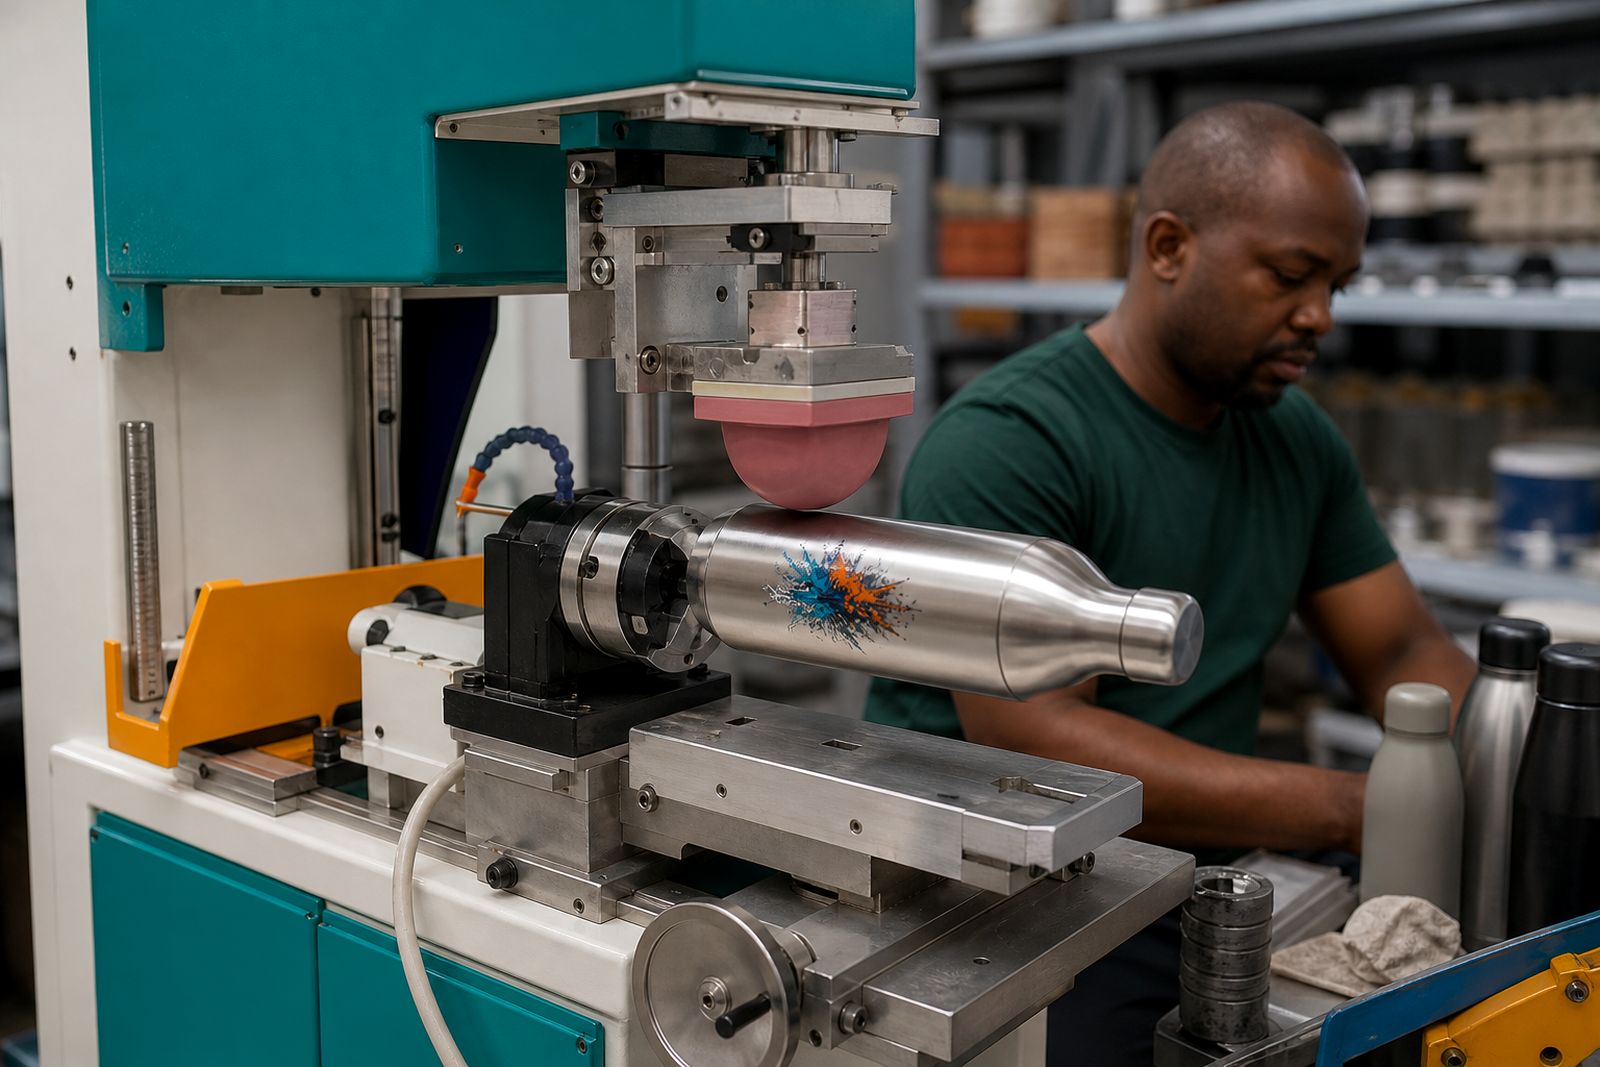
On a straight pen, the pad can touch down across a fairly even surface. A mug wall or bottle shoulder is different. The print area may rise away from the pad within a few millimetres, and that is where artwork starts to distort if the image is too wide or the pad is too hard. Tapered drinkware adds another problem because the top and bottom of the print area do not sit on the same radius.
The first job is to define a realistic print window, not the biggest area that looks available to the eye. In most workshops the cleanest result comes from sizing the artwork to the most stable part of the wall, then choosing a pad shape that can roll the image onto the item without collapsing at the edges. Trying to cover too much in one hit often leaves weak ink deposit on both sides.
- Short, centred artwork usually holds better than very wide logos.
- Gentle pad compression helps the image transfer without pushing ink past the intended edge.
- On tapered bottles, keep critical text away from the top and bottom extremes of the print area.
The item itself matters more than many buyers expect
Two white mugs can behave very differently on the machine. One may have a smooth coating that accepts the ink after proper surface preparation, while another may resist transfer or show tiny breaks in fine lines. Stainless bottles, powder-coated flasks, plastic tumblers and glazed ceramic mugs each need their own trial setup. In a coastal town with humid air, ink drying and adhesion can also shift during the day, so settings that looked good in the morning may need a small adjustment later.
Before settling on a production method, a branding shop should check the item surface, the straightness of the wall where the print will sit and the space available inside the jig. Handles, lids, silicone grips and shoulder curves can block access for the pad or limit how the item rotates into position. A good result starts long before the first print stroke, and that prep step gets rushed more often than it should.
- Ceramic and glass often need careful adhesion testing before full production.
- Powder-coated metal can print well, but surface texture affects fine detail.
- Soft plastic drinkware may flex in the jig and shift the print position.
- Decorative ridges or mould lines can break the image across the surface.
Jigs hold the job together
Drinkware printing usually succeeds or fails at the fixture. A bottle that rocks by even a fraction will show it in the registration line, especially on repeat work. Custom jigs are used to hold the item at one angle, present the same print zone to the pad every cycle and stop the operator from fighting the part by hand. For mugs, the handle position must be indexed properly so the logo lands in the same place from piece to piece.
In a Midrand workshop sending out branded flasks for a Gauteng event, the machine setup looked correct but the print kept drifting low on every tenth item. The fault was not the artwork or the ink. The bottle base had a slight shape variation and the original support cradle was too flat, so a revised jig with a better contact profile solved it. Once the item sat firmly, the image held position and the waste rate dropped. Small fixture changes often save far more than major machine adjustments.
For short runs, a simple jig can be enough. For steady commercial work on the same item, a properly machined fixture pays for itself by keeping registration stable and reducing handling mistakes.
Pad shape, hardness and artwork must agree
The plate image, pad form and item radius work as one system. If one part is wrong, the print will show it. A very soft pad may wrap beautifully over a rounded tumbler but can spread small text. A harder pad can sharpen detail, yet it may not conform to a shoulder curve and can leave incomplete transfer on the edges. The artwork must be drawn with the actual print area in mind, not just scaled from a flat proof.
For curved items, larger solids and medium line weights are usually easier to keep consistent than very delicate reversed details. Fine registration marks also need care, because a pad that compresses unevenly over a curved wall may place the second colour slightly off from the first. That does not mean multi-colour work is impossible, only that the image needs to suit the object.
- Use pad geometry that matches the item shape, not a one-pad-fits-all approach.
- Keep tiny text to surfaces that stay stable across the full print contact.
- Test the artwork width against the actual radius before committing to plates.
Ink choice and drying checks in South African conditions
On drinkware, ink selection is not just about colour. The system has to suit the substrate and the way the item will be used. Promotional mugs and bottles are handled, packed into cartons and moved between branches or event sites, so adhesion matters. Inks for coated metal, ceramic, glass and plastics are not interchangeable by wishful thinking. Additives, thinning ratio and shop temperature all influence transfer and cure.
Local conditions matter more than many new operators expect. A dry Highveld afternoon can pull solvent behaviour one way, while a mug run prepared in a humid coastal workshop may need a different balance to keep the image open on the plate and release cleanly from the pad. Proper testing includes scratch resistance, tape checks where suitable and a realistic look at how the item will be handled after printing. If the print has to sit close to a bottle curve or shoulder, the team should test that zone specifically, not only the easy middle section.
Where first-time buyers usually go wrong
Many first machine enquiries for drinkware start with the same assumption: if the item fits under the pad, it can print easily. In practice, the shape, the jig and the surface often decide whether the job is straightforward or fussy. A good setup plan looks at the full route from sample item to plate layout, pad selection, fixture build and operator training.
Shops moving from flat promotional items into mugs or bottles usually benefit from starting with a narrower job range and building repeatable methods before taking every shape that arrives at the counter. That keeps spoilage down and gives the operator a chance to learn how radius, pressure and dwell affect the result on real stock.
- Do not judge suitability from catalogue photos alone.
- Ask for machine setup guidance based on the actual item type.
- Plan for custom jigs when the product shape is irregular.
- Keep sample items from each batch for print and adhesion checks.
If your shop is adding drinkware to an existing branding line, our team can help with machines, pads, cliches, inks and fixture planning through our contact form.
What our Pad Printing customers say
Verified Google reviews
Questions we get asked
Can pad printing work on stainless steel bottles?
Yes, provided the bottle coating and finish are suitable for the ink system and the item can be held securely in a jig. Smooth coated metal generally behaves better than heavily textured surfaces.
Are mugs harder to print than pens?
Usually yes. A mug has a broader curve, a handle that affects positioning and coatings that vary from one item to another, so setup tends to be more exacting than on a standard promotional pen.
Do I need a custom jig for every drinkware shape?
For reliable commercial work, separate jigs are often the safest route. Items with different diameters, tapers or handle positions usually need their own support geometry to keep print placement consistent.
Also worth a look
Tell us about the job
Send sizes, materials and where you are through our contact form, and we will come back with the practical options.
Open the contact form